WordPress
On this page the functions you can use after creating your clone are described. Do you want to know how to create a WordPress clone? Then follow this guide.
For an optimal integration with Clonable, we recommend installing our WordPress plugin. The WordPress plugin offers a number of advantages compared to a standalone clone. Components such as setting up a subfolder, language switcher, language tags and analytics are all handled in the plugin.
Plugin installation
You can install the plugin via the WordPress plugin catalog. By searching for the term "Clonable" there, you will find our plugin.
After the plugin installation is complete, you can find the Clonable plugin in the sidebar under the name "Clonable." When you go to the plugin page, you will end up on the landing page.
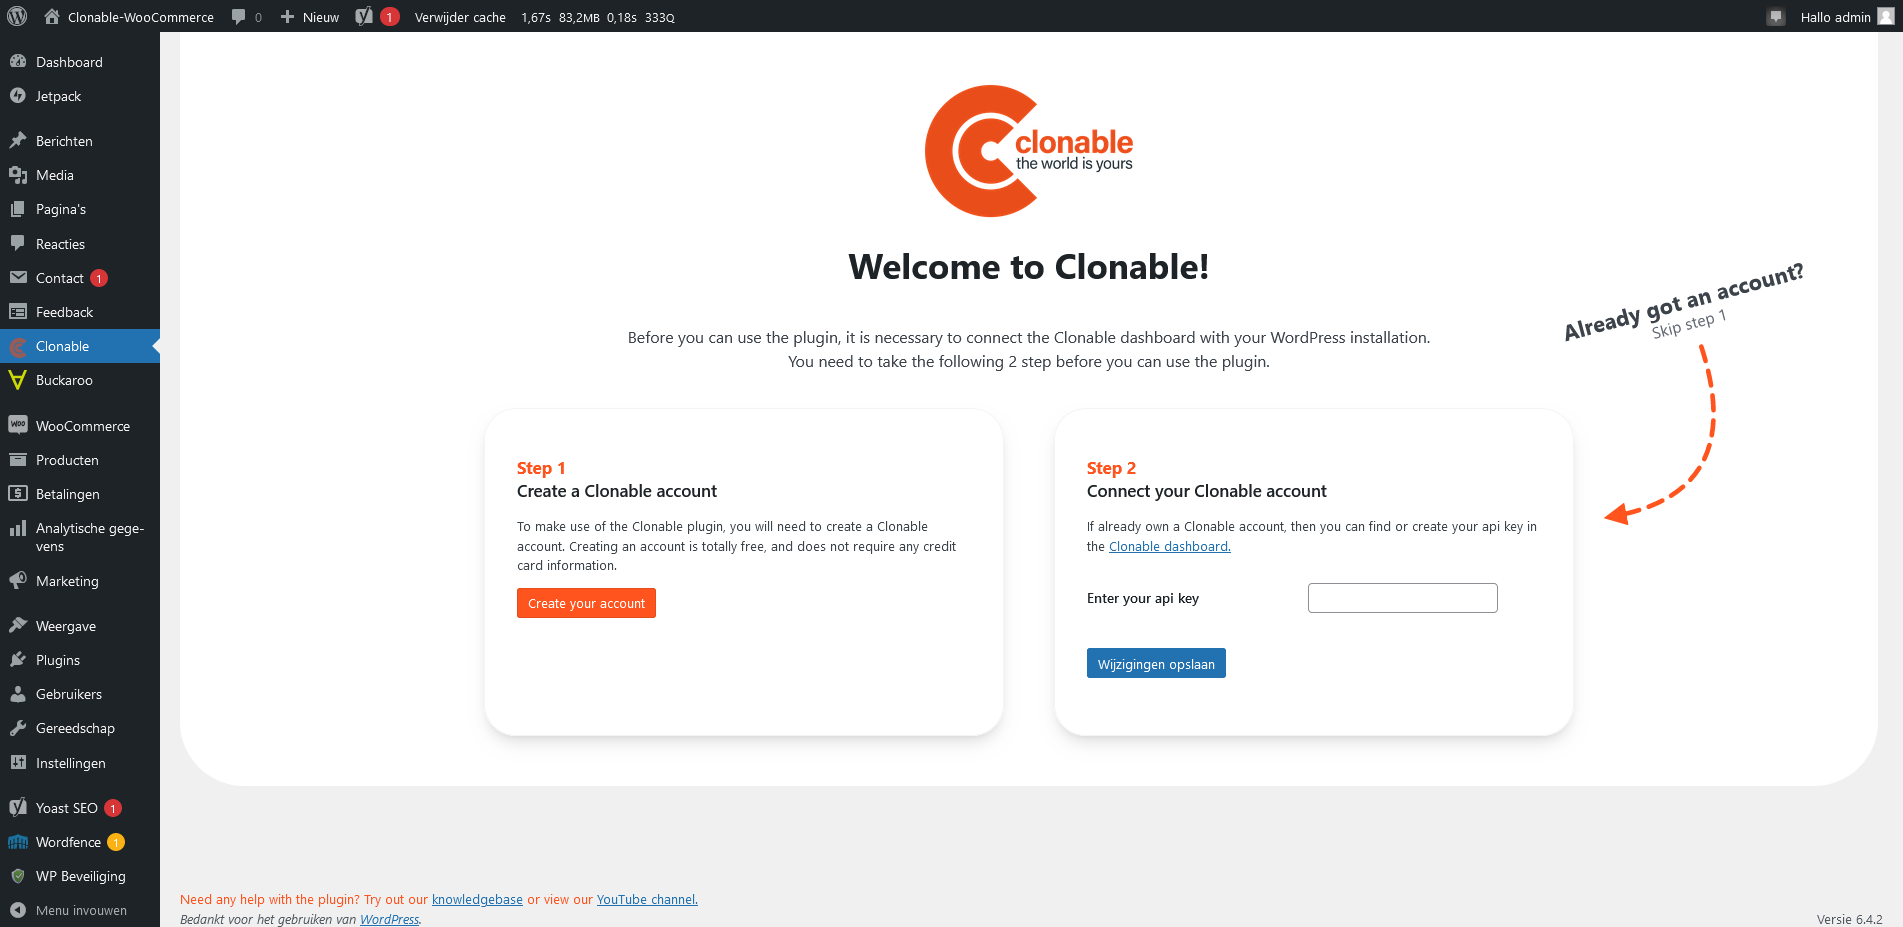
To get the plugin ready for use you have two options:
Option 1: I am new to Clonable
If you do not yet have an account at Clonable, you can create one via step 1 on the landing page. You will receive a registration email at the email address you entered. This email will forward you to https://app.clonable.net, where you can fill in your account details.
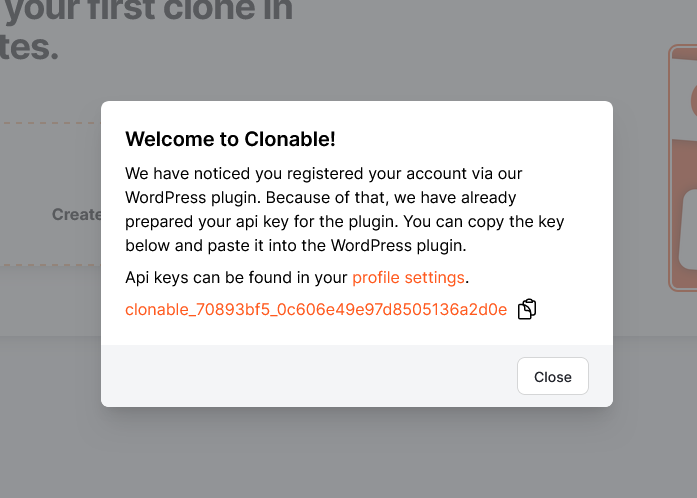
After you have created your account, an API key will be generated automatically. You will receive a pop-up in which your key can be copied. In the example below, the key is clonable_70893bf5_0c606e49e97d8505136a2d0e.
Option 2: I already have an account with Clonable
If you already have an account with Clonable, you can easily create an API key via the Clonable dashboard. You can find the settings for this on your profile page.
At the bottom of the profile page, you can find the API keys form, in it you can create a new key. In the Key name field, enter a recognizable name (for example WordPress), and then click "Create key".
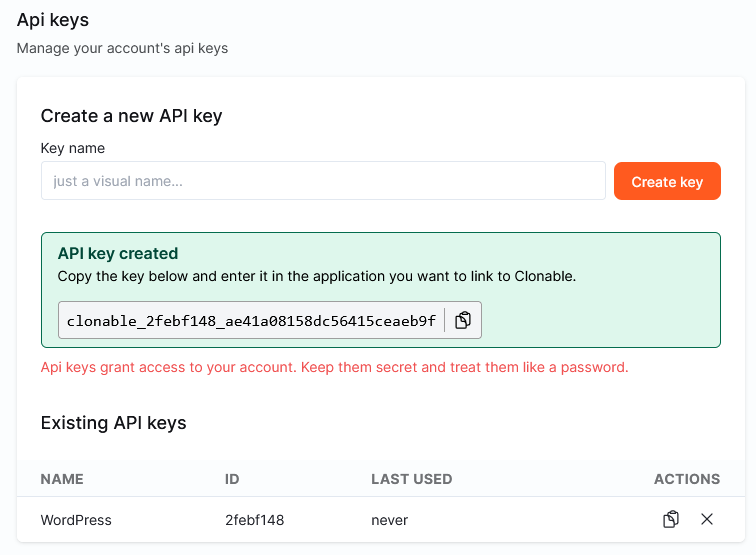
Clonable has created a new API key. In the example above, this is clonable_2febf148_ae41a08158dc56415ceaeb9f. Make sure you copy this key and paste it into the plugin at step 2 of the landing page.
If you already had clones within Clonable, all your data should now be synchronized with the plugin.
General Settings
On this landing page of the plugin settings, you will see a brief overview of linked clones with shortcuts to useful pages in the dashboard.
The Sync with Clonable button ensures that the site and clones in the Clonable dashboard are synchronized with the clones in the plugin. This is useful to do when you have made changes in the Clonable dashboard. This also immediately updates the settings for the language tags and language switcher.
Language Tags
In the Language Tags tab, you can adjust all settings that relate to the language tags.
What are language tags?
Language tags ensure that Google does not detect duplicate content on your clones, as this is bad for SEO. In addition, it ensures that search engines know that multiple versions of a web page exist, which can help with indexing.
<link rel="alternate" hreflang="x-default" href="https://woocommerce.testshops.nl/" />
<link rel="alternate" hreflang="nl-nl" href="https://woocommerce.testshops.nl/" />
<link rel="alternate" hreflang="es-es" href="https://woocommerce.testshops.nl/es/" />
When your clones use URL translations, it is important that the Translate URLs in language tags option is checked. When your clones do not use URL translations, we recommend turning this option off. This option can cause the website to have slightly longer loading times because the translations of URLs are looked up.
If your website already has language tags, it is not necessary to add them twice. You can then disable the language tags.
Language Switcher
In the Language Switcher tab you can enable and configure the Clonable language switcher. That way you don't have to place manual code on your pages.
Available types:
- Floating language switcher: is added to all pages via a script. Activate with “Enable floating language switcher”.
- Menu language switcher: add the switcher to a WordPress menu of your choice. Activate with “Enable menu language switcher” and link it via the Language switcher settings to the desired menu.
There is also the option to place the switcher via the shortcode: [clonable_language_switcher].
Tip: Use one method at a time to avoid duplicate switchers.
I already have a language switcher, how do I turn off Clonable's?
On the page there is an option named "Enable floating language switcher" and an option named "Enable menu language switcher". By unchecking these, Clonable will not add the language switcher to the page in any way.
Can I add additional languages to the language switcher?
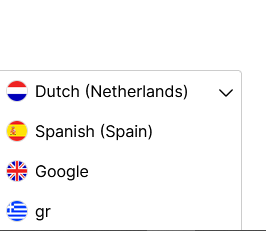
Yes, you can! At the bottom of the language switcher page, there is a table containing all the options that have been added to the page. Below is an example of which settings give which result.
These language switcher settings
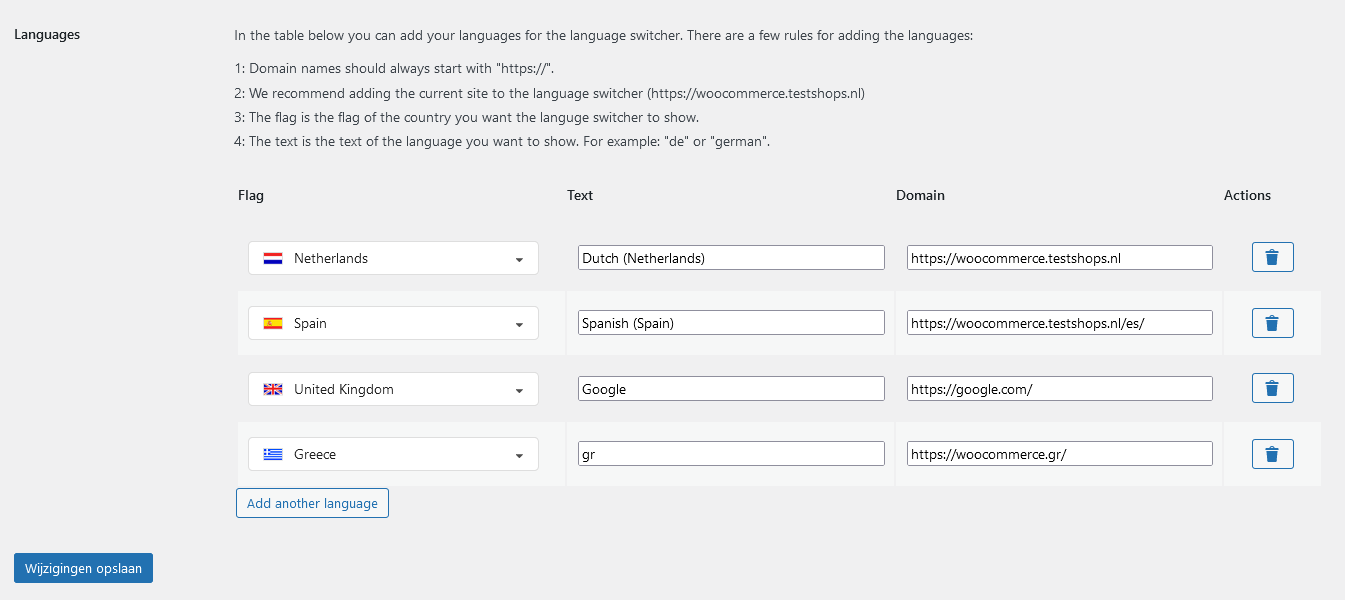
Give this result
WooCommerce
The settings of the WooCommerce module can be found on the WooCommerce page.
📄️ WooCommerce module
If your webshop runs on WooCommerce, there are certain changes you need to make to make sure your clone functions properly. You can read about those changes here.
Problems with the plugin?
It sometimes happens that something goes wrong in the plugin, or that things do not quite work as expected. For most of these problems there are often simple solutions.
When I visit the subfolder I get an error page
There are several types of error pages you can get when visiting a subfolder clone, some can simply be solved by waiting.
SSL: certificate subject name 'clonable.net' does not match target host name '{your domain}'
You get this error when you have registered and linked a subfolder clone via Clonable, and then delete the clone from Clonable, but not from the plugin. In this case, the plugin is not yet aware that the clone has been removed from Clonable, and is still trying to connect. For this, you can simply synchronize the plugin with Clonable using the "Sync with Clonable" button. Or you can delete the plugin if you no longer use it.
Error 421: unknown route
This error occurs when a subfolder is not correctly registered within Clonable. In this case, Clonable does not know where the data of the clone should go. Check that the clone's Clone subfolder is set correctly in the dashboard. This can also occur when you have just created your clone. Is this the case? Then wait another minute to let our systems get everything ready.
An error occurred. Please check the server logs
This error occurs when your WordPress installation tries to communicate with Clonable. The plugin then fails to retrieve the translated content of your page. This can be due to a number of things.
You can view more information when you are logged into your WordPress site as an admin. Here Clonable will show you a comprehensive error report. Common problems below include: An invalid SSL certificate, or a delayed connection with Clonable.
I do have the language switcher on, but I don't see it at all
The language switcher is off by default, then it is not shown. To make sure it becomes visible in the way you want, you can adjust the following settings:
- Enable floating language switcher ➡ ensures that the floating language switcher is loaded on the page
- Enable menu language switcher ➡ ensures that the menu language switcher is loaded on the page
- Show flag ➡ shows the flag you have set for the language
- Show text ➡ shows the text you have entered for the language
- Rounded flags ➡ ensures that flags are shown round (instead of rectangular)
It can also happen that a caching plugin is active on your site. In that case, clear the cache and try again.
I'm trying to create a clone, but it doesn't work
It is currently only possible to create subfolder clones via the plugin. If, for example, you want to add a new domain or a subdomain, you will have to do that via the dashboard.
Furthermore, you can also get some error messages when creating a clone.
You don't have any space left in your subscription. Please update your subscription via the clonable dashboard.
You will get this message if you exceed the limits of your current subscription. This is because each subscription has a maximum number of clones that can be added. If you still want to add a clone, you can upgrade your subscription via the Clonable dashboard, or add a clone with an add-on.
Your account is unable the create clones via the api.
When you get this error message, your account is too old to create clones from within the WordPress plugin. Not to worry! You can always create a clone within the dashboard and then link it to the plugin by synchronizing it with Clonable.
The subfolder clone has already been used.
You get this message if the subfolder you are trying to add already exists. This may be because Clonable is not yet properly synchronized with the plugin, or the clone already exists within another subscription.
Once you have entered the api key in the plugin, make sure the clones and site of Clonable are under your account. Should the clones be under another account or a team account, you will have to change the key manually.
I have a WordPress installation, but I still can't create subfolder clones
While cloning your website, Clonable tries to detect which CMS you use (for example WordPress or WooCommerce). It may happen that Clonable does not correctly detect which CMS you use, this may be due to a slow connection or Clonable simply getting it wrong.
You have 2 possible solutions to this problem:
- When you do not yet have any clones under your site, the easiest way is to delete your site and recreate it (this does not involve any costs).
- Otherwise, you will have to contact Clonable so that the CMS can be corrected by the support team.