WordPress
In this guide, you will learn how to easily set up an international version of your WordPress site using Clonable.
Would you prefer to be guided step by step through the installation of Clonable? Read our user-friendly installation guide, no technical knowledge required! View the guide here.
Downloading the Clonable plug-in
By far the easiest way to get started with Clonable on a WordPress site is to download our plugin.
If you can't or don't want to add a plug-in to your WordPress site, you can always follow the guide for other platforms. If you still want to use the features provided by the plug-in later, you can always still install it.
You can install the plugin via the WordPress plugin catalogue. By searching there for the term "Clonable", you will find our plugin.
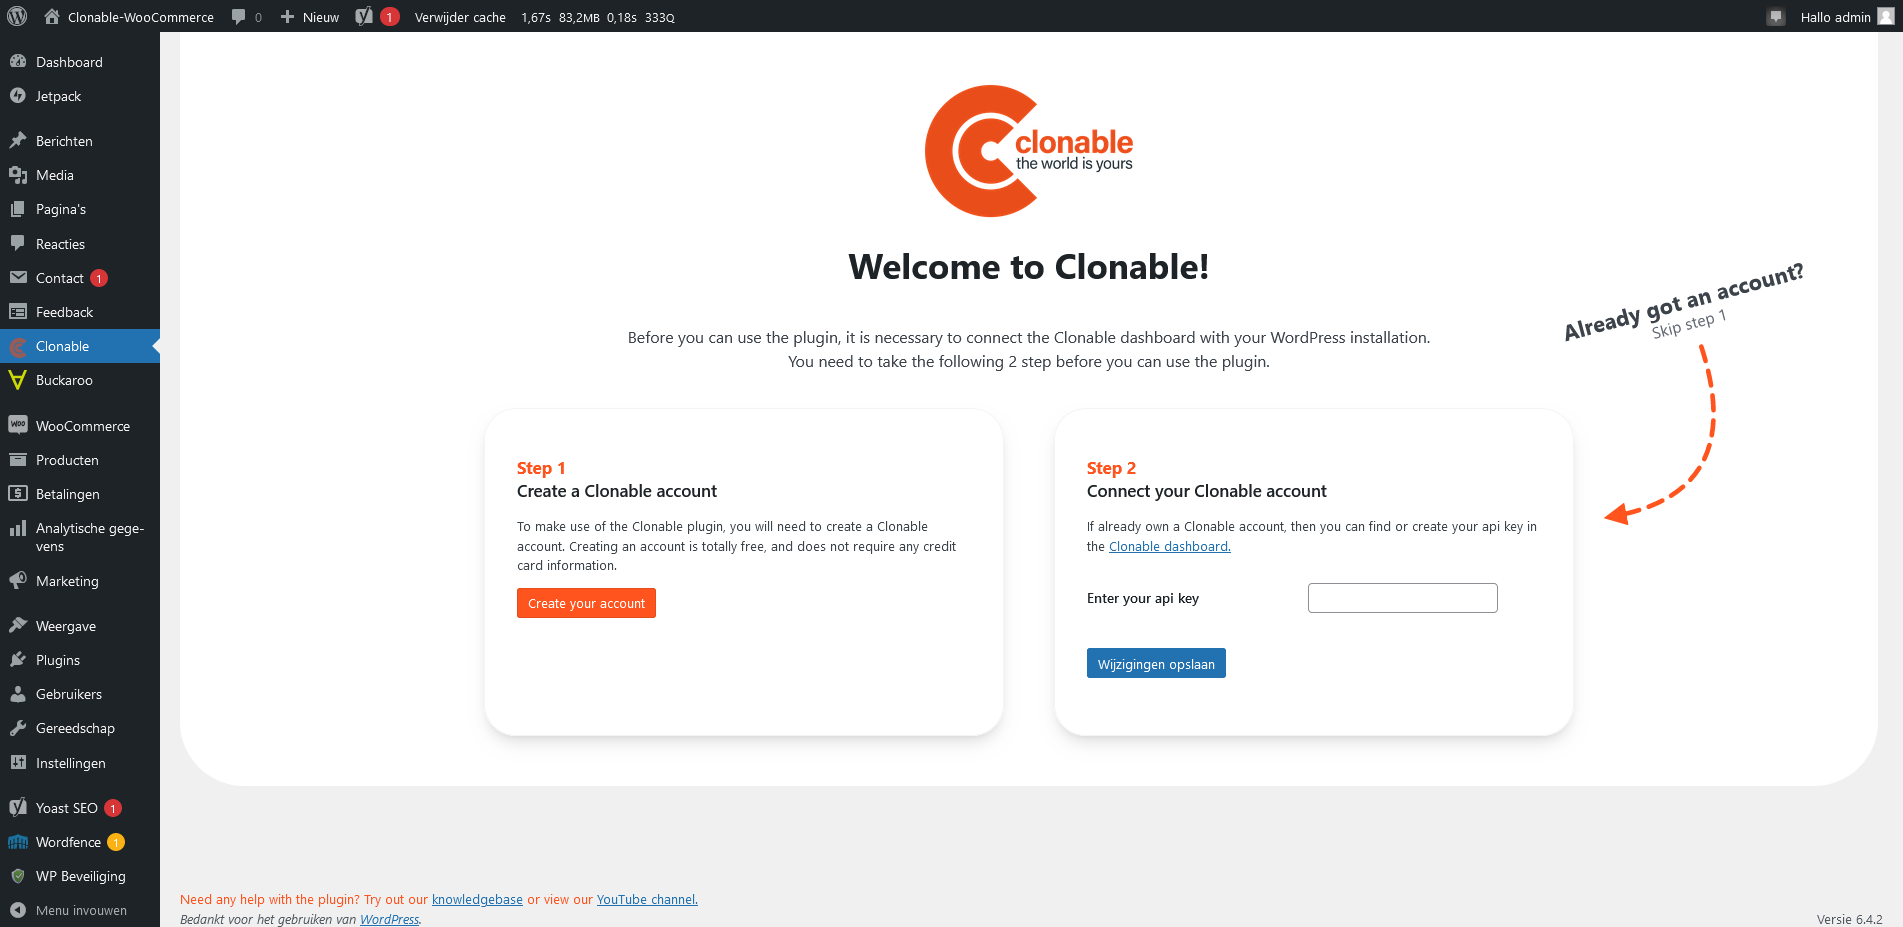
After the plugin installation is complete, you can find the Clonable plugin in the sidebar under the name "Clonable". When you go to the plugin page, you will be taken to the landing page.
Linking your Clonable account to the plug-in
Option 1: I am new to Clonable
If you do not yet have an account with Clonable, you can create one via step 1 on the landing page. You will receive a registration email at the email address you entered. This email will redirect you to https://app.clonable.net, where you can enter your account details.
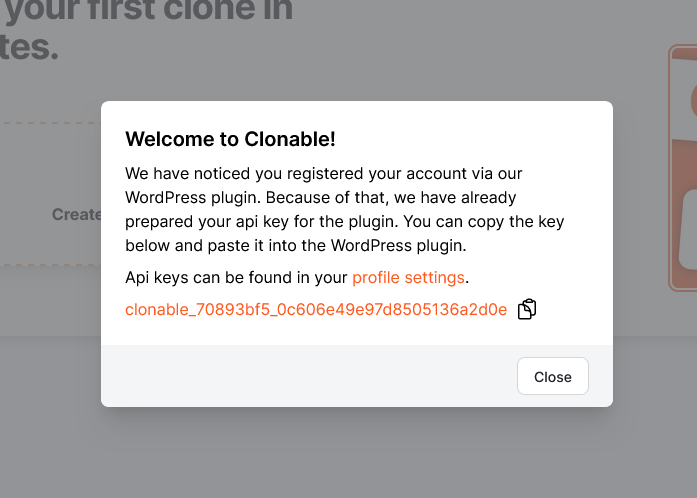
After you create your account, an API key will be generated automatically. You will get a pop-up in which your key can be copied. You can find the key in the example below clonable_70893bf5_0c606e49e97d8505136a2d0e.
Option 2: I already have an account with Clonable
If you already have an account with Clonable, you can easily create an API key via the Clonable dashboard. You can find the settings for this on your profilepage.
At the bottom of the profile page, you can find the API keys form, in which you can create a new key. In the Key name field, enter a recognisable name (e.g. WordPress), and then click "Create key".
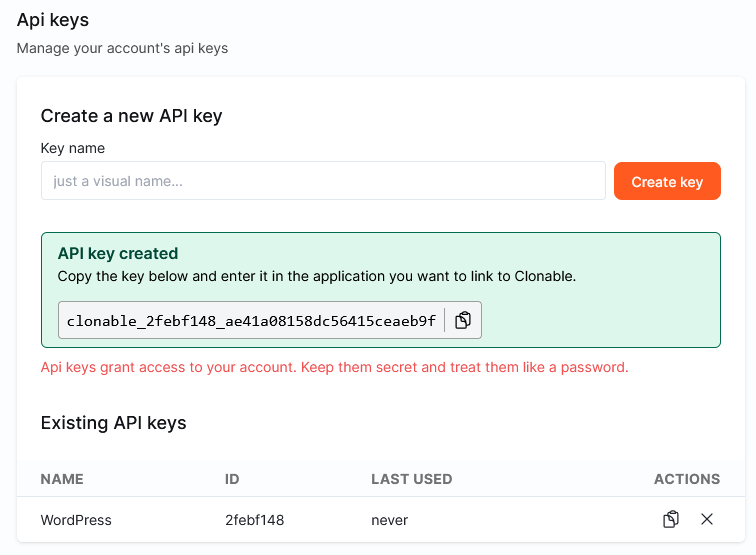
Clonable has created a new API key. In the above example, this is clonable_2febf148_ae41a08158dc56415ceaeb9f. Make sure you copy this key and paste it into the plugin at step 2 of the landing page.
If you already had clones within Clonable, all your data should now be synchronised with the plugin.
Creating a site
If you don't yet have a site within Clonable, you can create one via the plugin. The plugin will automatically detect the details of your website. Check that these details are correct and then click the blue button.
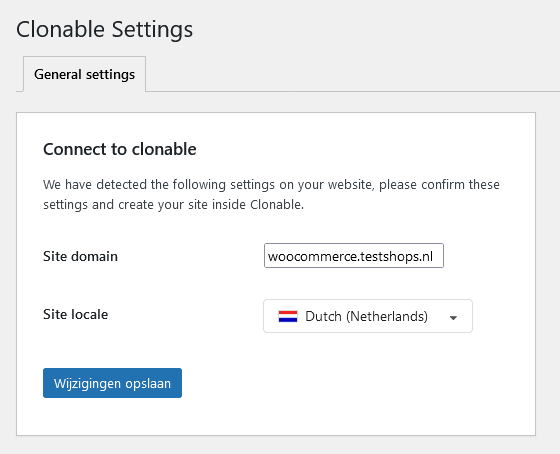
If the site is successfully created, the page will automatically refresh and display a message "Your site is successfully connected to Clonable!".
If something went wrong or you got an error when creating the site, you can still create the site via the Clonable dashboard. This could be because you already have an older account with Clonable, for example.
Creating a clone
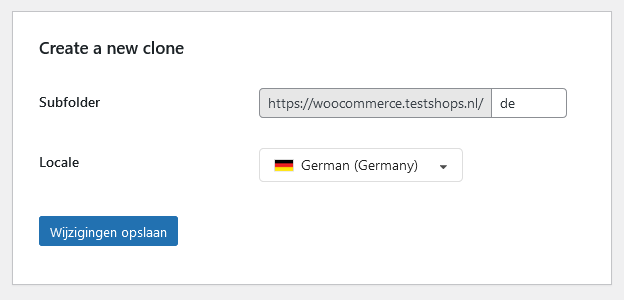
Through the plugin, it is only possible to create a subfolder clone. Creating clones on a new domain or a subdomain is still possible, these can be created via the Clonable dashboard.
By entering a subfolder and choosing a language for the plugin, you can easily add new clones to your WordPress installation. Under subfolder, enter the subfolder where the new clone should be located. Under locale, enter the language and region in which the clone should be created.
Should there be no more room within your subscription to add new clones, you can increase your account limit via the Clonable dashboard.
